

As a software engineer with some knowledge in cybersecurity, I've always been conscious about the balance between convenience and control in the tools I use. Recently, I decided to overhaul the contact form on my personal blog by migrating from a third-party service to a custom-built solution.
In this post, I'll walk through my journey, explaining the architectural decisions, security considerations, and the technical implementation details of taking ownership of this seemingly simple but critical website component.
The Previous Setup: Third-Party Form Service
Initially, my contact form relied on Web3Forms, a common third-party form handling service.
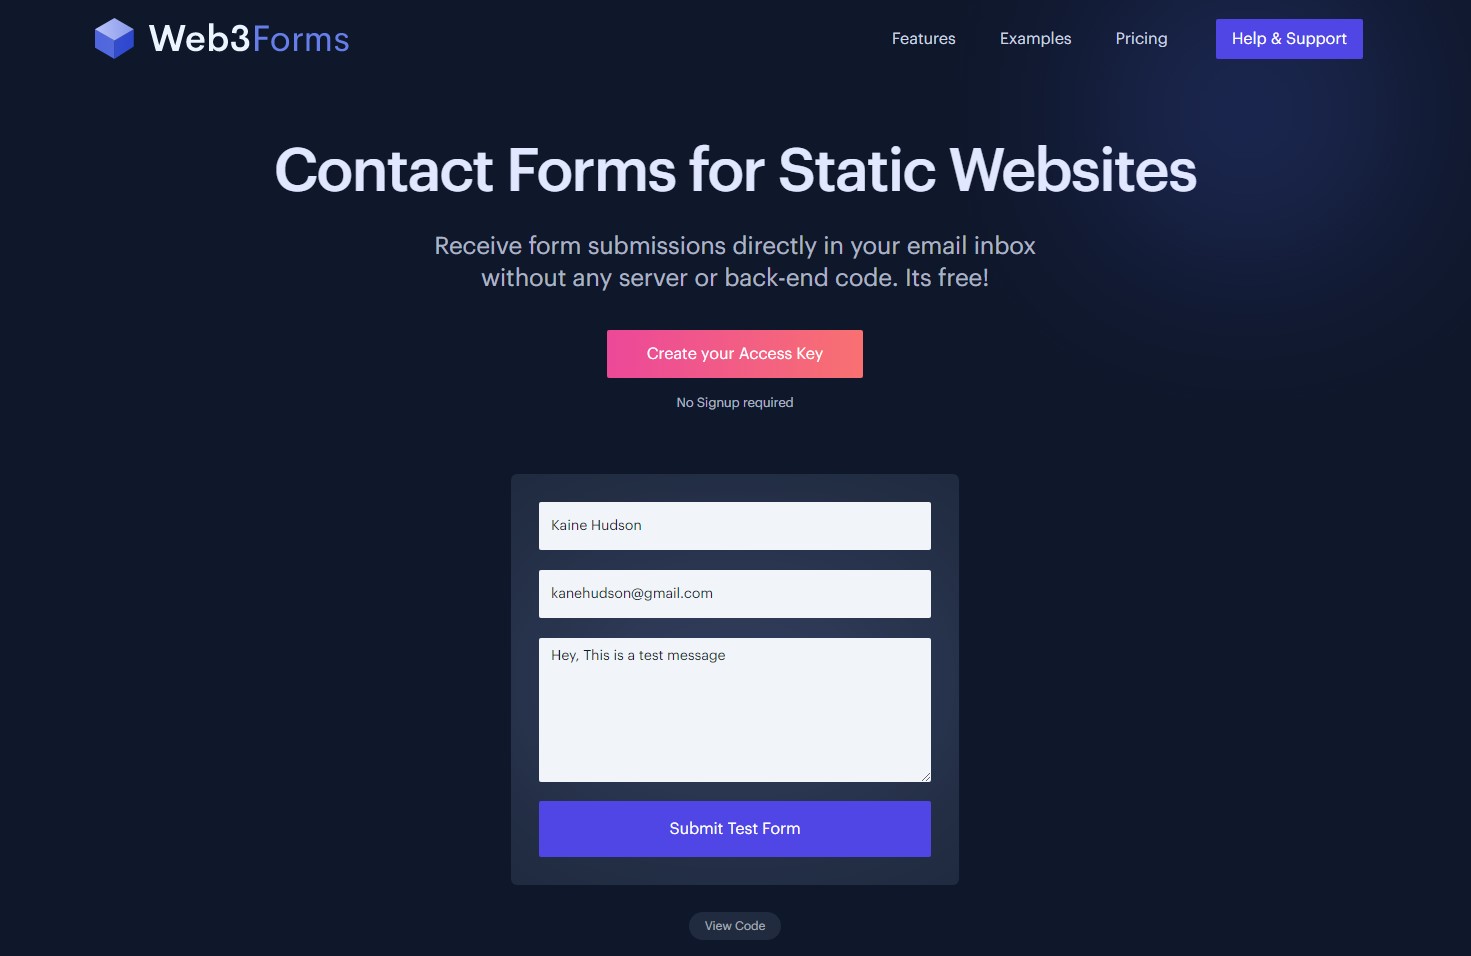
Basically, it is a HTML contact form looks like below:

The JavaScript code for the previous setup focused primarily on ensuring the hCaptcha was properly rendered and validating its response before submission, for the detailed guide, Web3Forms actually have a very detailed guide below:
This approach relied entirely on Web3Forms to handle the form processing, email delivery, and spam protection. I just needed to include their access key, set up a redirect URL, and integrate hCaptcha for bot protection. While it worked, I had little visibility into what happened after the form was submitted.
Why I Decided to Build My Own Solution
While third-party services offer convenience, they come with limitations. I couldn't customize the form processing logic or add sophisticated validation rules beyond what the service provided. All form submissions went through a third-party server before reaching me, which raised data privacy concerns. Additionally, I was dependent on Web3Forms' reliability – if they experienced downtime or shut down, my contact form would stop working.
As someone who values both security and flexibility, I wanted more control over how user data was processed and stored. This led me to design a custom solution using tools I trust: Cloudflare Workers and n8n workflow automation.
The New Architecture: A Three-Tier Approach
My custom contact form architecture consists of three main components:
- Frontend Form: HTML/JavaScript form with client-side validation and hCaptcha integration
- Middleware Layer: Cloudflare Worker that handles form submission, security checks, and forwarding
- Backend Processing: n8n workflow that validates data, formats it, and sends emails
Frontend: HTML/JavaScript Form
Let's dive into the technical details of my new frontend implementation:
<form id="contactForm" method="POST" novalidate>
    <input type="hidden" name="form_key" value="my-form-key">
    <input type="hidden" name="subject" value="[Fanyang Meng's Blog] New Contact Form Submission">
    <label for="name">Your Name</label>
    <input name="name" id="name" type="text" />
    <label for="email">Your Email</label>
    <input name="email" id="email" type="email" required />
    <label for="message">Your Message</label>
    <textarea name="message" id="message" required></textarea>
    <div id="hCaptcha" class="h-captcha" data-captcha="true" data-sitekey="my-hcaptcha-site-key"></div>
    <button type="submit">Send message</button>
</form>
My latest JavaScript implementation uses a namespaced approach for better organization and more robust handling of hCaptcha in a single-page application environment:
// Create a namespace for my contact form functionality
window.mfyContactForm = window.mfyContactForm || {};
window.mfyContactForm.captchaWidgetId = null;
window.mfyContactForm.isInitialized = false;
window.mfyContactForm.captchaLoaded = false;

// This function will be called when hCaptcha is fully loaded
function onHcaptchaLoad() {
  console.log('hCaptcha API loaded');
  window.mfyContactForm.captchaLoaded = true;
  sessionStorage.setItem('hcaptchaLoaded', 'true');

  // Only initialize if not already done and we're on the contact page
  if (!window.mfyContactForm.isInitialized && document.getElementById('contactForm')) {
    window.mfyContactForm.initContactForm();
  }
}
This implementation takes a significantly more advanced approach to handling the captcha and form functionality. Let me break down the key improvements:
1. Namespaced Architecture
I've organized all the contact form functionality under a single namespace (window.mfyContactForm), which provides several benefits:
- Prevents pollution of the global namespace
- Reduces the risk of conflicts with other JavaScript libraries
- Keeps related functionality logically grouped
- Makes it easier to track state across different functions
This approach is especially important for blogs and websites where multiple JavaScript libraries might be running simultaneously.
2. Explicit hCaptcha Rendering
Instead of relying on automatic rendering, I now use the explicit rendering API which gives me more control:
// Function to set up captcha
window.mfyContactForm.setupCaptcha = function() {
  console.log('Setting up captcha');
  const hCaptchaDiv = document.getElementById('hCaptcha');

  // If div isn't found or hCaptcha isn't loaded yet, exit
  if (!hCaptchaDiv || !window.hcaptcha || !window.mfyContactForm.captchaLoaded) {
    console.log('Cannot setup captcha yet - missing div or API not loaded');
    return false;
  }

  // Clean up first
  window.mfyContactForm.cleanupCaptcha();

  // Render a new captcha
  try {
    window.mfyContactForm.captchaWidgetId = window.hcaptcha.render('hCaptcha', {
      sitekey: 'my-sitekey'
    });
    console.log('Captcha rendered with ID:', window.mfyContactForm.captchaWidgetId);
    return true;
  } catch (e) {
    console.error('Error rendering hCaptcha:', e);
    return false;
  }
};
The explicit rendering approach provides several advantages:
- Better control over when and how the captcha is displayed
- Proper cleanup between page navigations
- Ability to track the captcha widget ID for proper removal
- More robust error handling
3. Proper Cleanup for SPA Navigation
One of the biggest challenges with captchas in single-page applications is cleaning up properly between page transitions. My solution includes a dedicated cleanup function:
// Function to clean up captcha - safer version
window.mfyContactForm.cleanupCaptcha = function() {
  console.log('Cleaning up captcha');

  // Only attempt to remove if hCaptcha is loaded and we have a widget ID
  if (window.hcaptcha && window.mfyContactForm.captchaWidgetId !== null) {
    try {
      window.hcaptcha.remove(window.mfyContactForm.captchaWidgetId);
      console.log('Captcha widget removed');
    } catch (e) {
      console.log('Note: No active captcha to remove');
    }
    window.mfyContactForm.captchaWidgetId = null;
  }

  // Always clear the div
  const hCaptchaDiv = document.getElementById('hCaptcha');
  if (hCaptchaDiv) {
    hCaptchaDiv.innerHTML = '';
  }
};
This function is called during navigation events to ensure clean transitions between pages:
document.addEventListener('pvs.navigation.before-render', function() {
  console.log('Navigation event: before render');
  window.mfyContactForm.cleanupCaptcha();
  window.mfyContactForm.isInitialized = false;
});
4. Comprehensive SPA Navigation Handling
My implementation includes event handlers for different stages of single-page application navigation:
// Setup event handlers for client-side routing
document.addEventListener('pvs.navigation.content-rendered', function() {
  console.log('Navigation event: content rendered');

  // Only initialize if we're on the contact page
  if (document.getElementById('contactForm')) {
    // Give a slight delay to ensure the DOM is ready
    setTimeout(function() {
      window.mfyContactForm.initContactForm();
    }, 100);
  }
});

document.addEventListener('pvs.navigation.before-render', function() {
  console.log('Navigation event: before render');
  window.mfyContactForm.cleanupCaptcha();
  window.mfyContactForm.isInitialized = false;
});
This approach ensures that the form works correctly as users navigate through the site without full page reloads, preventing memory leaks and duplicate event handlers.
5. Form Submission Handler
The form submission handler has been simplified to focus on its core responsibility:
// Function to handle form submission
window.mfyContactForm.handleSubmit = function(e) {
  e.preventDefault();

  const form = e.target;
  const formData = new FormData(form);

  // Check if captcha is completed
  const hCaptchaResponse = formData.get('h-captcha-response');
  if (!hCaptchaResponse) {
    alert("Please complete the captcha");
    return;
  }

  // Show loading state
  const submitButton = form.querySelector('button[type="submit"]');
  const originalButtonText = submitButton.textContent;
  submitButton.disabled = true;
  submitButton.textContent = "Sending...";

  // Submit to Cloudflare Worker
  fetch('https://blog-contact-form-proxy.mfy.workers.dev/', {
    method: 'POST',
    body: formData
  })
  .then(response => response.json())
  .then(data => {
    if (data.success) {
      window.location.href = "https://fanyangmeng.blog/form-submitted-successfully/";
    } else {
      alert("Error: " + (data.error || "Unknown error"));
      // Reset button
      submitButton.disabled = false;
      submitButton.textContent = originalButtonText;
    }
  })
  .catch(error => {
    console.error('Error:', error);
    alert("There was an error submitting the form.");
    // Reset button
    submitButton.disabled = false;
    submitButton.textContent = originalButtonText;
  });
};
This function provides clear visual feedback during the submission process and handles errors gracefully.
Middleware Layer: Cloudflare Worker
My Cloudflare Worker serves as a security gateway between the frontend and backend processing. Let's examine the key components:
Request Handling and CORS
addEventListener("fetch", (event) => {
  const handleRequestAndAddCors = async (request) => {
    const response = await handleRequest(request);
    return addCorsHeaders(response);
  };

  event.respondWith(handleRequestAndAddCors(event.request));
});

function addCorsHeaders(response) {
  const newHeaders = new Headers(response.headers);
  newHeaders.set("Access-Control-Allow-Origin", self.ALLOWED_ORIGIN);
  newHeaders.set("Access-Control-Allow-Methods", "POST, OPTIONS");
  newHeaders.set("Access-Control-Allow-Headers", "Content-Type");

  return new Response(response.body, {
    status: response.status,
    statusText: response.statusText,
    headers: newHeaders
  });
}
This code handles the incoming fetch event and ensures that proper CORS headers are added to every response. By explicitly setting Access-Control-Allow-Origin to my domain (stored in the ALLOWED_ORIGIN environment variable), I ensure that only my website can interact with this worker.
Rate Limiting with KV Namespace
One of the most interesting technical aspects is the rate limiting implementation using Cloudflare's KV namespace:
async function checkRateLimit(ip) {
  // Constants for rate limiting
  const MAX_REQUESTS = 5;           // Maximum requests allowed
  const TIME_WINDOW = 60 * 60;      // Time window in seconds (1 hour)
  const KEY_PREFIX = "ratelimit:";  // Prefix for KV store keys

  try {
    // Create a key for this IP
    const key = `${KEY_PREFIX}${ip}`;

    // Get current count for this IP
    let count = 0;
    let data = await RATE_LIMITS.get(key);

    if (data) {
      // Parse existing data
      data = JSON.parse(data);
      count = data.count;

      // If count already exceeds limit, rate limit is in effect
      if (count >= MAX_REQUESTS) {
        log("info", "Rate limit in effect", { ip, count });
        return true;
      }
    }

    // Increment the counter
    count++;

    // Store updated count with expiration
    await RATE_LIMITS.put(
      key,
      JSON.stringify({ count, ip }),
      { expirationTtl: TIME_WINDOW }
    );

    log("info", "Rate limit status", { ip, count, limit: MAX_REQUESTS });

    // Return false if under the limit, true if at/over the limit
    return count > MAX_REQUESTS;
  } catch (error) {
    // Log error but don't rate limit on errors
    log("error", "Rate limiting error", {
      error: error.message,
      ip
    });
    return false;
  }
}
This implementation uses Cloudflare's KV (Key-Value) namespace, which is a globally distributed, eventually consistent key-value data store.

Here's how the rate limiting works:
- I create a unique key for each IP address with a prefix (
ratelimit:123.45.67.89) - I fetch the current count for that IP from the KV store
- If the count exists and exceeds the limit (5 requests per hour), I return
trueto indicate the rate limit is in effect - Otherwise, I increment the counter and store it back with an expiration time (1 hour)
- The
expirationTtlparameter automatically removes the entry after the time window, ensuring that users aren't permanently rate-limited
This approach is highly efficient because:
- It uses Cloudflare's distributed KV store, which is designed for low-latency reads
- The expiration is handled automatically without needing a cleanup process
- It's stateless across worker invocations, allowing the worker to scale
hCaptcha Verification
Another crucial security component is server-side verification of hCaptcha tokens:
async function validateHCaptcha(token) {
  log("info", "Validating hCaptcha token", { tokenLength: token ? token.length : 0 });

  if (!token) {
    log("error", "Empty hCaptcha token");
    return false;
  }

  // Use URLSearchParams instead of FormData for more reliable server-to-server requests
  const params = new URLSearchParams();
  params.append("secret", self.HCAPTCHA_SECRET);
  params.append("response", token);

  try {
    log("info", "Sending verification to hCaptcha API");

    const verification = await fetch("https://hcaptcha.com/siteverify", {
      method: "POST",
      headers: {
        'Content-Type': 'application/x-www-form-urlencoded'
      },
      body: params.toString()
    });

    if (!verification.ok) {
      const errorText = await verification.text();
      log("error", "hCaptcha API error", {
        status: verification.status,
        response: errorText
      });
      return false;
    }

    const result = await verification.json();
    log("info", "Complete hCaptcha validation result", result);

    return result.success === true;
  } catch (error) {
    log("error", "hCaptcha validation error", { error: error.message });
    return false;
  }
}
This function performs a server-to-server verification of the hCaptcha token, ensuring it was actually solved by a human and not spoofed. The use of URLSearchParams over FormData is intentional, as it provides more reliable encoding for server-to-server requests.
Content Analysis for Spam Detection
I also implemented pattern-based spam detection:
function containsSuspiciousContent(message) {
  // Check for common spam patterns
  const spamPatterns = [
    /\b(?:viagra|cialis|casino|lottery|winner)\b/i,
    /\b(?:buy|cheap|free|offer|discount)\b.{0,20}\b(?:now|today|limited)\b/i,
    /\b(?:money|cash|dollar).{0,20}\b(?:guarantee|earn|make)\b/i,
    /\b(?:SEO|backlink|ranking)\b.{0,30}\b(?:service|offer|improve)\b/i
  ];

  return spamPatterns.some(pattern => pattern.test(message));
}
This function uses regular expressions to identify common spam patterns. The patterns target specific word combinations that appear frequently in spam messages. For example, the second pattern looks for marketing phrases like "buy now" or "cheap today" by using word boundaries (\b), allowing up to 20 characters between words (.{0,20}), and case-insensitive matching (/i).
Backend Processing: n8n Workflow
The final component is my n8n workflow. It has only three nodes: Webhook node, code node and send email node.
The code node provides additional validation and data formatting:
// Enhanced security validation and data formatting
const data = $input.first().json;

try {
  // Extract body data
  const body = data.body || {};

  // Basic validation with detailed error messages
  if (!body.email) {
    return { valid: false, reason: 'Missing email address' };
  }

  if (!body.message) {
    return { valid: false, reason: 'Missing message content' };
  }

  // Email format validation
  const emailRegex = /^[^\s@]+@[^\s@]+\.[^\s@]+$/;
  if (!emailRegex.test(body.email)) {
    return { valid: false, reason: 'Invalid email format' };
  }

  // Check for reasonable message length
  const MAX_MESSAGE_LENGTH = 5000;
  if (body.message.length > MAX_MESSAGE_LENGTH) {
    return { valid: false, reason: `Message exceeds maximum length of ${MAX_MESSAGE_LENGTH} characters` };
  }

  // Check for empty message after trimming whitespace
  if (body.message.trim().length === 0) {
    return { valid: false, reason: 'Message contains only whitespace' };
  }

  // Use timestamp from Cloudflare Worker if available
  const timestamp = body.timestamp
    ? new Date(parseInt(body.timestamp)).toISOString()
    : new Date().toISOString();

  // Format the data for email
  return {
    valid: true,
    subject: body.subject || '[Blog] Contact Form Submission',
    name: body.name || 'Anonymous',
    email: body.email,
    message: body.message,
    timestamp: timestamp,
    metadata: {
      source: body.source || 'unknown',
      ip: body.ip || 'unknown',
      originalTimestamp: body.timestamp
    }
  };
} catch (error) {
  // Catch any unexpected errors
  return {
    valid: false,
    reason: `Processing error: ${error.message}`,
    error: error
  };
}
This n8n code node performs several important functions:
- It extracts the request body from the incoming webhook data
- It performs additional validation on email format and message content
- It handles potential errors and edge cases (empty messages, excessively long content)
- It normalizes the timestamp data
- It structures the data in a consistent format for the email node
What's particularly valuable here is that I can easily modify this code to add new validation rules or formatting requirements without touching the frontend or Cloudflare Worker.
Comparing the Two Approaches
Let's examine the key differences between my previous third-party solution and my custom implementation.
Security Considerations
My third-party solution relied entirely on Web3Forms' security practices, which were somewhat of a black box to me. While I could add hCaptcha to prevent bot submissions, I had no visibility into what additional security measures were in place. I couldn't customize security parameters or implement features like rate limiting.
With my custom solution, I've implemented multiple security layers with defense in depth. The frontend validates inputs before submission. The Cloudflare Worker adds origin validation, rate limiting, server-side hCaptcha verification, and content pattern analysis. The n8n workflow adds yet another validation layer before email delivery. Each component has clear security responsibilities, and I can adjust the security parameters as needed based on emerging threats.
The rate limiting implementation is particularly powerful. By using Cloudflare's KV namespace, I can track submission attempts across multiple edge locations globally. This prevents attackers from bypassing rate limits by rotating IP addresses or distribution requests across regions. The implementation is also efficient, with automatic cleanup of expired rate limit counters.
Control and Data Flow
With Web3Forms, the data flow was straightforward but opaque. Form submissions went directly to their servers, and I had little visibility into processing, validation, or error handling. My form data passed through third-party infrastructure before reaching me, raising potential privacy concerns.
My custom solution gives me complete visibility and control over the entire data flow. I can see exactly how data moves from the user's browser through my Cloudflare Worker to my n8n workflow and finally to my inbox. I've added detailed logging at each step, allowing me to trace issues and understand patterns in form submissions. All data stays within infrastructure that I control, except for the necessary hCaptcha verification step.
The code in my Cloudflare Worker is particularly important for controlling this data flow. The main handler function orchestrates the entire validation and forwarding process:
async function handleFormSubmission(request) {
  try {
    // Parse form data
    const formData = await request.formData();

    // Extract and validate required fields
    const name = formData.get("name") || "";
    const email = formData.get("email");
    const message = formData.get("message");
    const formKey = formData.get("form_key");
    const captchaResponse = formData.get("h-captcha-response");

    log("info", "Form submission received", { name, email });

    // Validate form key
    if (formKey !== self.FORM_SECRET_KEY) {
      log("warn", "Invalid form key", { receivedKey: formKey });
      return new Response(JSON.stringify({
        success: false,
        error: "Invalid form submission"
      }), {
        status: HTTP_FORBIDDEN,
        headers: { "Content-Type": "application/json" }
      });
    }

    // ... additional validation steps ...

    // Forward to n8n webhook with authentication
    const authHeader = "Basic " + btoa(`${self.N8N_AUTH_USERNAME}:${self.N8N_AUTH_PASSWORD}`);

    // Create a new FormData to send to n8n
    const n8nFormData = new FormData();
    for (const [key, value] of formData.entries()) {
      n8nFormData.append(key, value);
    }

    // Add additional metadata
    const timestamp = Date.now().toString();
    n8nFormData.append("timestamp", timestamp);
    n8nFormData.append("source", "cloudflare-worker");
    n8nFormData.append("ip", request.headers.get("CF-Connecting-IP") || "unknown");

    log("info", "Forwarding to n8n", { url: self.N8N_WEBHOOK_URL });
    const response = await fetch(self.N8N_WEBHOOK_URL, {
      method: "POST",
      headers: {
        "Authorization": authHeader
      },
      body: n8nFormData
    });

    // ... handle response and return to client ...
  } catch (error) {
    return handleError(error, "Error in form submission:");
  }
}
This function not only validates the submission but also enriches it with valuable metadata like IP address and timestamp. It uses HTTP Basic Authentication when forwarding to n8n, ensuring that only authorized requests are processed.
Maintenance and Reliability
The third-party solution required minimal maintenance – I just needed to keep my access key updated and ensure the form was properly integrated with Web3Forms. However, I was dependent on their service reliability and had limited debugging capabilities when issues arose.
My custom solution requires more active maintenance. I need to monitor and update three separate components: the frontend form, the Cloudflare Worker, and the n8n workflow. I need to ensure that environment variables are properly set and that each component is functioning correctly. However, this increased maintenance comes with significant benefits: complete visibility for debugging, the ability to update individual components without affecting others, and independence from third-party service availability.
The thorough debugging in my updated JavaScript implementation is particularly valuable for maintenance. By logging each step of the form initialization, captcha rendering, and submission process, I can quickly identify when and where issues occur. The form cloning technique also helps prevent subtle bugs from event listener duplication in single-page applications.
Why This Architecture Works
My three-tier architecture follows several best practices in security and systems design. The separation of concerns is clear: the frontend handles user interaction, the Cloudflare Worker handles security and forwarding, and n8n handles final processing and email delivery. Each component has a single responsibility, making the system easier to maintain and update.
By leveraging Cloudflare Workers as middleware, I get the benefits of edge computing – my security checks run close to the user, providing fast responses while filtering out malicious traffic before it reaches my backend. The rate limiting implementation using KV namespaces provides global protection against abuse with minimal performance impact.
Using n8n for the backend processing gives me a visual workflow builder while maintaining full control over the processing logic. The workflow can be easily modified and extended without touching the frontend or middleware layers.
Conclusion
Building a custom contact form solution might seem like overkill for a personal blog, but as a security-minded engineer, I value the control and peace of mind it provides. The architecture I've implemented offers stronger security, better privacy, and more flexibility than relying on third-party services.
The JavaScript implementation now provides enhanced robustness through its modular design, with separate functions for form handling, captcha rendering, and initialization. The clever technique of cloning the form to prevent event duplication ensures reliable operation even in complex single-page applications. The extensive logging helps me quickly identify and resolve any issues that might arise.
The Cloudflare Worker's rate limiting through KV namespaces provides efficient protection against abuse, and the n8n workflow ensures consistent data formatting and delivery. While this approach requires more initial setup and ongoing maintenance, the benefits far outweigh these costs for my specific needs.
I now have complete visibility into the entire contact form process, can implement custom logic at any stage, and don't have to worry about a third-party service disappearing. My updated JavaScript implementation also ensures a smoother user experience with better error handling and visual feedback during form submission.
For anyone considering a similar migration, I'd recommend evaluating the tradeoffs based on your specific needs. If security, flexibility, and control are important to you, a custom implementation might be worth considering. If simplicity and minimal maintenance are your priorities, third-party services still have their place.
What security improvements have you made to your website recently? I'd love to hear about your experiences in the comments below.
Discussion